ReactiveCocoa
Notes and takeaways about ReactiveCocoa
I started following ReactiveCocoa a long time ago, and recently decided to introduce it into a project for the following reasons:
- It was a good opportunity to get familiar with the reactive programming (functional programming) model
- After iterations from version 0.0.1 to 2.3.1, the framework had become relatively mature
- It was a chance to try the MVVM pattern
From the time I first started learning ReactiveCocoa until now, I sometimes felt that I was not using it to its full potential. For example:
1
2
3
4
5
@weakify(self);
[[self.nextButton rac_signalForControlEvents:UIControlEventTouchUpInside] subscribeNext:^(id x) {
     @strongify(self);
     [self performSegueWithIdentifier:@"Captcha" sender:nil];
}];
This kind of one-way signal delivery and subscription has no relationship with other signals, so it feels no different from the action-target pattern. It seems to drift away from the original purpose of reactive programming, although that may be a bit extreme.
Countdown Feature
Let’s start with the very common verification-code countdown feature. With RAC, it can be implemented almost in one go. 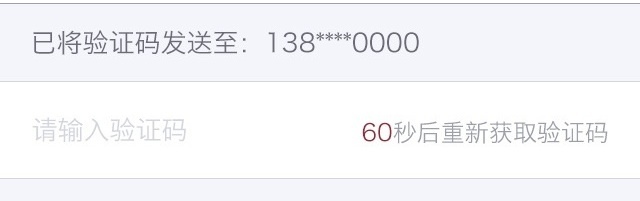 Clicking the button can restart the countdown.
1
2
3
4
5
6
7
8
9
10
11
12
13
14
15
16
  @weakify(self);
  RACSignal *timeSignal = [[[[[RACSignal interval:1.0f onScheduler:[RACScheduler mainThreadScheduler]] take:numberLimit] startWith:@(1)] map:^id(NSDate *date) {
      @strongify(self);
      if (number == 0) {
          [self.timeButton setTitle:@"Resend" forState:UIControlStateNormal];
          return @YES;
      }
      else{
          self.timeButton.titleLabel.text = [NSString stringWithFormat:@"%d", number--];
          return @NO;
      }
  }] takeUntil:self.rac_willDeallocSignal];
  self.timeButton.rac_command = [[RACCommand alloc]initWithEnabled:timeSignal signalBlock:^RACSignal *(id input) {
      number = numberLimit;
      return timeSignal;
  }];
+ (RACSignal *)interval:(NSTimeInterval)interval onScheduler:(RACScheduler *)schedulerreturns a signal that fires once every second on the main thread. Internally, RAC uses a series of GCD APIs such asdispatch_source_set_timer,dispatch_source_set_event_handler, anddispatch_resumeto implement it. Note that the value sent by this signal is anNSDateobject representing the current date, but that value is not used by the feature itself.- (instancetype)take:(NSUInteger)counttakes the firstnumberLimitsendNextvalues, which is equivalent to how long we want the countdown to last.- (instancetype)startWith:(id)valuechanges the firstsendNextvalue and immediately sends that value. In theory, the actualsendNextvalue does not matter, because the signal returned by+ (RACSignal *)interval:(NSTimeInterval)interval onScheduler:(RACScheduler *)schedulerwaits one second before firing.startWithis used simply to start the countdown immediately, so the parameter value ofstartWith:is not important.- (instancetype)map:(id (^)(id value))blockchanges the finalsendNextvalue to return@YESor@NO.- (RACSignal *)takeUntil:(RACSignal *)signalTriggermeans that the countdown stops when this VC is about to deallocate. Internally, RAC just sendscompleted.- Finally, bind
timeSignaltotimeButton.rac_commandto determine whether the button is enabled, and starttimeSignal. When the button is clicked, restore the value ofnumber, andreturn buttonSignalto restart the countdowntimeSignal.
Replacing the Delegate Pattern
If RAC is used well, you can almost stop writing custom delegate protocols. Imagine this: when aVC presentViewController’s bVC, and then dismissViewControllerAnimated is called on bVC, aVC needs to do something afterward. A delegate protocol can solve this, but it is somewhat cumbersome. Using RAC makes the implementation much cleaner and clearer.
The key method here is - (RACSignal *)rac_signalForSelector:(SEL)selector, and basic usage looks like this:
1
2
3
4
[[self rac_signalForSelector:@selector(dismiss:)] subscribeNext:^(id x) {
	NSLog(@"%s", __func__);
}];
1
2
3
- (IBAction)dismiss:(id)sender{
    [self dismissViewControllerAnimated:YES completion:NULL];
}
When dismiss: is executed, the signal is subscribed to.
We get to decide when the signal is subscribed to. Since some work needs to happen in aVC, we should find a way to subscribe to the signal in aVC. At that point, the signal needs to be exposed as a property of bVC.
bVC.h
1
2
3
4
#import <UIKit/UIKit.h>
@interface RACDelegateViewController : UIViewController
@property (nonatomic, strong) RACSignal *delegateSignal;
@end
Subscribing to the signal
aVC.m
1
2
3
4
5
6
7
8
9
- (void)prepareForSegue:(UIStoryboardSegue *)segue sender:(id)sender{
    if ([segue.destinationViewController isKindOfClass:[UINavigationController class]]) {
        UINavigationController *nav = (UINavigationController *)segue.destinationViewController;
        RACDelegateViewController *delegateVC = (RACDelegateViewController *)nav.topViewController;
        [delegateVC.delegateSignal subscribeNext:^(id x) {
            NSLog(@"%@", x);
        }];
    }
}
There is one last step: create delegateSignal.
bVC.m
1
2
3
4
- (void)awakeFromNib{
    [super awakeFromNib];
    self.delegateSignal = [self rac_signalForSelector:@selector(dismiss:)];
}
Note: never create delegateSignal in - (void)viewDidLoad;. If you do, delegateSignal will still be nil when subscribeNext is executed.
It is still not perfect, right? The data received in aVC is always a UIBarButtonItem object. How can data from bVC be passed to aVC instead? We still need to adjust the signal. The - (RACSignal *)then:(RACSignal * (^)(void))block; method ignores all next values from the receiver until the signal completes, then returns a new RACSignal. Example:
1
2
3
4
5
6
7
8
- (void)awakeFromNib{
    [super awakeFromNib];
    @weakify(self);
    self.delegateSignal = [[self rac_signalForSelector:@selector(dismiss:)] then:^RACSignal *{
        @strongify(self);
        return [RACSignal return:self.array];
    }];
}
When the signal [self rac_signalForSelector:@selector(dismiss:)] sends complete, a block is executed, and that block must return a non-nil new RACSignal. Of course, there are other approaches as well, such as using map on the signal:
1
2
3
4
5
6
7
8
- (void)awakeFromNib{
    [super awakeFromNib];
    @weakify(self);
    self.delegateSignal = [[self rac_signalForSelector:@selector(dismiss:)] map:^id(id value) {
        @strongify(self);
        return self.array;
    }];
}
If you need to listen to protocol methods, you can use - (RACSignal *)rac_signalForSelector:(SEL)selector fromProtocol:(Protocol *)protocol. For details, see my shared notes.
Automatic Data Updates
Note: this feature is only suitable for UITableView and UICollectionView whose row and section counts remain unchanged.
Some time ago, I read two objc.io articles about lighter View Controllers and cleaner Table View code. I also tried combining ReactiveCocoa with UITableView. Here are some of my experiments.
- KVO data source array
1
2
3
4
5
6
7
8
9
10
- (id)initWithCellIdentifier:(NSString *)aCellIdentifier
          configureCellBlock:(CellConfigureBlock)aConfigureCellBlock{
    self = [super init];
    if (self) {
        _cellIdentifier = aCellIdentifier;
        _configureCellBlock = [aConfigureCellBlock copy];
        _signal = RACObserve(self, dataSource);
    }
    return self;
}
- Use
mapon the data source to obtain a single data model
1
2
3
4
5
6
7
8
9
10
11
12
- (UITableViewCell *)tableView:(UITableView *)tableView cellForRowAtIndexPath:(NSIndexPath *)indexPath{
    UITableViewCell *cell = [tableView dequeueReusableCellWithIdentifier:_cellIdentifier
                                                            forIndexPath:indexPath];
    if (self.configureCellBlock) {
        @weakify(self);
        self.configureCellBlock(cell, [self.signal map:^id(NSArray *array) {
            @strongify(self);
            return [self itemAtIndexPath:indexPath];
        }]);
    }
    return cell;
}
- Usage in the VC
1
2
3
4
self.model = [[DataSourceGeneralModel alloc] initWithCellIdentifier:CelIdentifier
                                                 configureCellBlock:^(TableViewCell *cell, RACSignal *signal) {
        [cell configureCellWithSignal:signal];
    }];
- Configuration in the cell
1
2
3
4
5
6
7
8
- (void)configureCellWithSignal:(RACSignal *)signal{
    @weakify(self);
    [signal subscribeNext:^(Model *model) {
        @strongify(self);
        self.titleLabel.text = model.title;
        self.detailLabel.text = model.detail;
    }];
}
If the data source array changes, UITableView updates accordingly. There is no need to call [self.tableView reloadData]; just update it like this:
1
self.model.dataSource = @[model1];
You can download the examples above from GitHub
Replacing dispatch_group
Traditional dispatch_group setup and usage
1
2
3
4
5
6
7
8
9
10
11
12
13
14
15
16
17
18
19
20
21
22
23
24
25
26
27
28
29
30
31
32

// Create a dispatch_group object
static dispatch_group_t home_request_operation_completion_group() {
    static dispatch_group_t http_request_operation_completion_group;
    static dispatch_once_t onceToken;
    dispatch_once(&onceToken, ^{
        http_request_operation_completion_group = dispatch_group_create();
    });
    return http_request_operation_completion_group;
}
// .......
- (void)viewDidLoad{
    [self updateData];
}
- (void)updateProfit{
// Add one asynchronous method
    dispatch_queue_t queue = dispatch_get_global_queue(DISPATCH_QUEUE_PRIORITY_DEFAULT, 0);
    dispatch_group_async(home_request_operation_completion_group(), queue, ^{
    dispatch_group_enter(home_request_operation_completion_group());
        [self update1];
    });
// Add another asynchronous method
    dispatch_group_async(home_request_operation_completion_group(), queue, ^{
    dispatch_group_enter(home_request_operation_completion_group());
        [self update2];
    });
// Stop pull-to-refresh when both asynchronous methods have finished
    dispatch_group_notify(home_request_operation_completion_group(), dispatch_get_main_queue(), ^{
        if ([self.tableView isHeaderRefreshing]) {
            [self.tableView headerEndRefreshing];
        });
};
Using RAC instead of dispatch_group
1
2
3
4
5
6
7
- (void)updateProfit{
    [[RACSignal zip:@[[self update1], [self update2]]] subscribeNext:^(RACTuple *x) {
        @strongify(self);
        if ([self.tableView isHeaderRefreshing]) {
            [self.tableView headerEndRefreshing];
        });
    }];
Of course, [self update1] and [self update2] need to be rewritten to return RACSignal objects here.
+ (instancetype)zip:(id<NSFastEnumeration>)streams waits until all bound signals have sent next before subscribing to the combined result.
For the difference between combineLatest and zip, see my notes.