Setting Up a Jekyll Blog
Setting up a Jekyll blog, migrating to GitCafe
Note:
Since the blog has changed both hosting platform and theme, the comments on earlier posts were lost. I would like to apologize to everyone who left comments back then.
The reason I switched the blog platform to Jekyll is mainly because I liked this theme, and because Jekyll is very easy to set up and use. Below I will explain how to build your own personal blog with Jekyll in a Mac OS X environment.
Environment Setup
First, install the required tools:
- Ruby: included by default on Mac OS X 10.5 and later
- RubyGems: included by default on Mac OS X 10.5 and later
- NodeJS: run
node -vin the terminal to check whether it is installed; download it from http://nodejs.org/ - Xcode Command-Line Tools: installed automatically when Xcode is installed. Check whether
Preferences → Downloads → Componentsoffers Command-Line Tools for download. If not, it means they are already installed - git: run
git --versionin the terminal to check whether it is installed; download it from http://sourceforge.net/projects/git-osx-installer/
Due to networking issues in mainland China, you need to replace the gem source mirror unless you have another safe way to access the internet.
1
2
3
4
5
// remove the official mirror
 gem sources --remove https://rubygems.org/
// add the Taobao mirror, or another mirror address
 gem sources -a http://ruby.taobao.org/
Verify whether the replacement succeeded with gem sources -l:
1
2
*** CURRENT SOURCES ***
http://ruby.taobao.org/
Then update gem first:
1
2
3
sudo gem update --system
// If you are using El Capitan on macOS, use this command instead
sudo gem update -n /usr/local/bin --system
Install Jekyll:
1
2
3
sudo gem install jekyll
// If you are using El Capitan on macOS, use this command instead
sudo gem install -n /usr/local/bin jekyll
If you later encounter the following issue while previewing the blog with jekyll server:
1
2
Deprecation: Collection#map should be called on the #docs array directly.
                    Called by /Users//Documents/blog/_plugins/rssgenerator.rb:46:in `block in generate'.
or a similar error, install a Jekyll version earlier than 3.0:
1
2
3
sudo gem install jekyll -v '<3.0.0'
// If you are using El Capitan on macOS, use this command instead
sudo gem install -n /usr/local/bin jekyll -v '<3.0.0'
Installing the Theme
Fork the theme I use, kasper (this is my old theme).
Rename the forked repository to
xxxxxx.github.io, wherexxxxis your GitHub username. For example, if your username is bawn, then you should rename it tobawn.github.io, which is also the address of your blog.Click the
settingsmenu on the right side of the repository, then change theRepository namethere.
After these two steps, enter xxxxxx.github.io or xxxxxx.github.com in your browser, and your personal blog page should appear (you may need to wait a few minutes). At this point, your blog should already contain the default post from the theme author called Welcome to Jekyll!
Publishing Posts
1
2
3
4
// directory where the theme should be placed
cd Documents
// clone the theme you just forked
git clone https://github.com/xxxx/xxxxx.github.io
After this, there should be a xxxxx.github.io folder under your Documents directory (this is the blog directory). The markdown files inside the _posts folder are the source files for published posts.
The naming rule for a new post is xxxx-xxx-xx-xxxxxxx.md. For example, the file name of this post is 2015-01-23-bolgSetUp. The content also needs to follow certain rules. Below is the header format for this post:
1
2
3
4
5
6
7
8
9
10
11
12
13

---
layout: post
title: "Jekyll Blog Setup"
date: 2015-01-23
comments: true
categories: iOS
tags: [Jekyll]
keywords: Jekyll blog
description: Jekyll blog setup
---

Because the blog has changed both hosting platform and theme, the comments on earlier posts were lost. I would like to apologize to everyone who left comments back then.
The official Jekyll documentation is a bit frustrating. It recommends writing code blocks using Liquid-style markdown syntax, like this: 
GitHub stopped supporting the redcarpet parser after May 1, so it is recommended to use kramdown. For a solution, add markdown: kramdown to the _config.yml file according to the tutorial. The author of this theme has already fixed this issue.
So a kramdown code block can be written like this:
1
2
3
```
CABasicAnimation *position = [CABasicAnimation animationWithKeyPath:@"position"];
```
Local Preview
In the terminal, go to the blog directory and run:
1
jekyll server // short for jekyll s
Then enter http://localhost:4000/ in your browser to preview locally. Additions, edits, and deletions to posts can all be seen in real time. Just refresh the page. You can try editing the default post to see the effect.
Publishing Posts
Publishing a post is basically the same as committing changes to a git project. The rough workflow in the blog directory is:
1
2
3
git add .
git commit -m 'xxxxx'
git push origin master
After that, you should be able to see the new post on your personal blog homepage.
Note:
The following content applies to blogs built with the https://github.com/rosario/kasper theme.
Replacing Google Fonts
Google Fonts are currently working normally, and it seems that 360 has already shut down its font proxy, so no changes are needed.
Configuring Blog Information
Modify the _config.yml file, for example like this:
1
2
3
4
5
6
7
8
9
10
11
12
13
14
15
16
17
18
name: Bawn
description: Blogging about stuffs
meta_description: "Bawn's Blog"

markdown: kramdown
redcarpet:
extensions: ["no_intra_emphasis", "fenced_code_blocks", "autolink", "tables", "with_toc_data"]

highlighter: pygments
logo: false
paginate: 20
baseurl: /
domain_name: 'http://bawn.github.io/'
google_analytics: 'UA-XXXXXXXX-X'

# Details for the RSS feed generator
url:            '/rss.xml'
author:         'Bawn'
Adding Duoshuo Comments
Replace the content between <footer class="post-footer"> and </footer> in _layouts/post.html with the Duoshuo comment code. After replacement, it looks like this:

However, I still do not know how to assign a value to data-thread-key in the Duoshuo code.
Custom Code Highlighting
If you are not satisfied with the theme’s code highlighting, you can easily customize it. For example, to configure the highlighting style I am currently using:
- On the BootCSS CDN page, find the style you like. For example, I use
hopscotch, whose corresponding effect is shown here: . You can view the style preview on the highlight.js demo site, then click
 copy <link>tag. - Find
_layouts/default.htmland edit it. Locate the<!-- Customisation -->code, then paste the code you just copied below it. The head section should then look like this: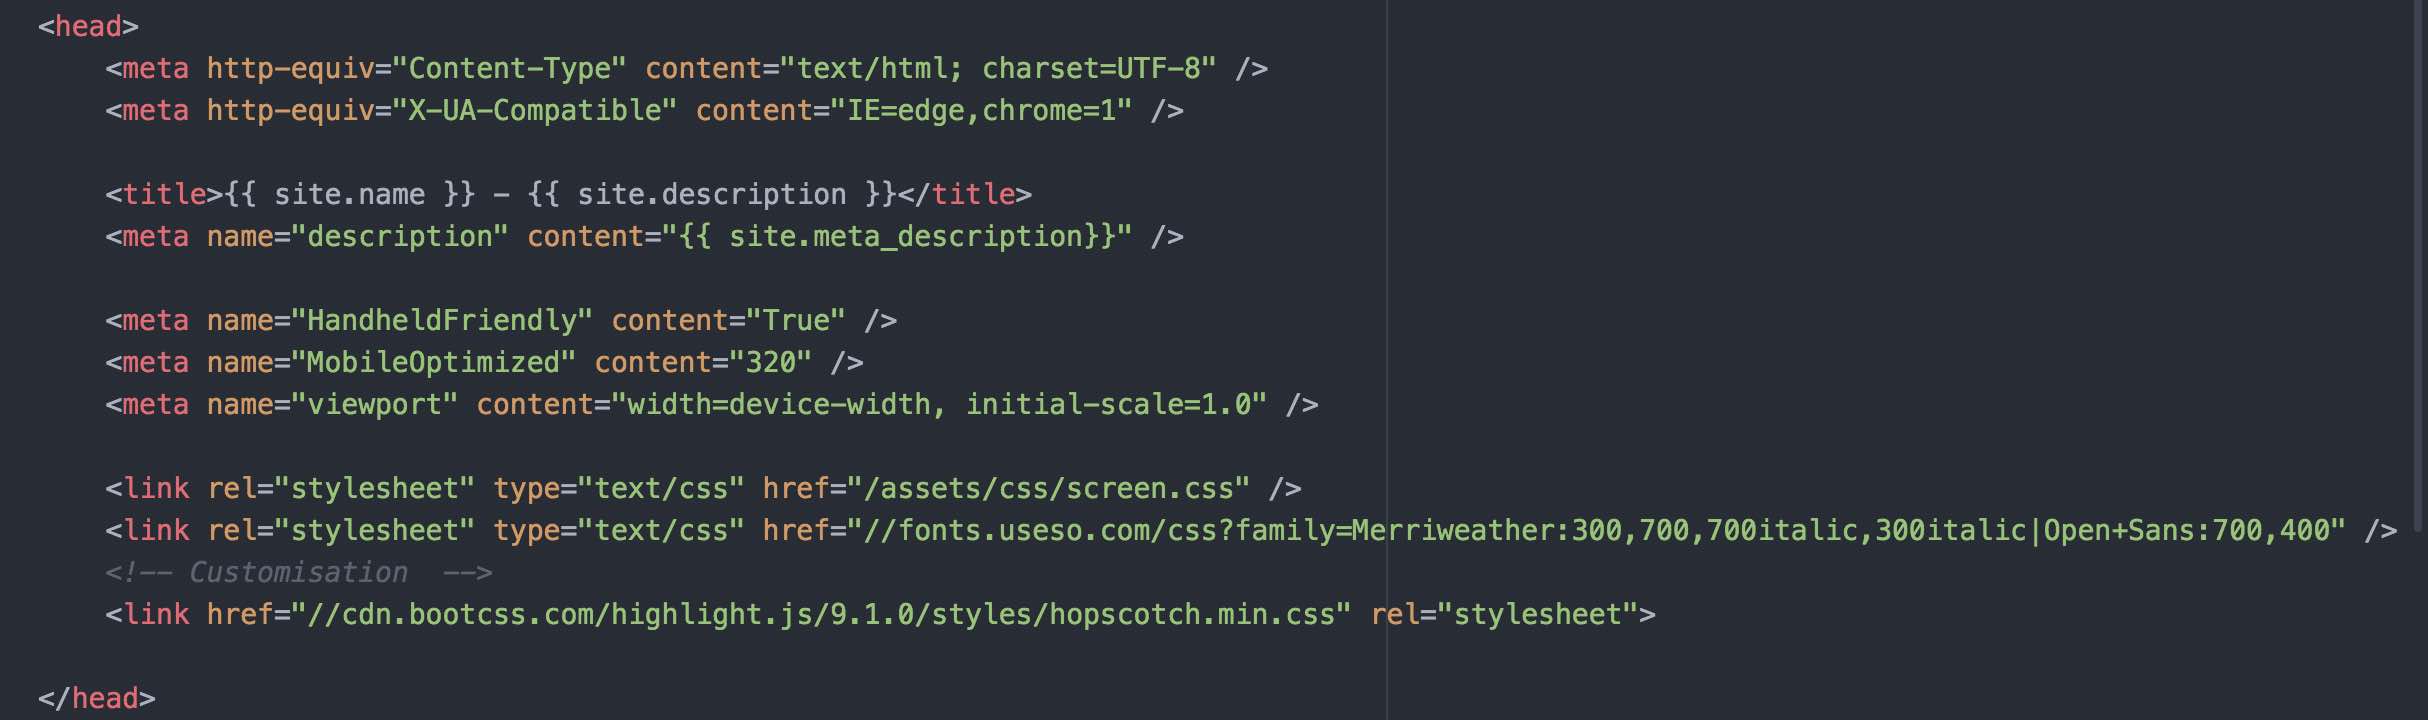
- Still in
_layouts/default.html, find<script type="text/javascript" src="/assets/js/index.js"></script>and add the following code below it:
1
2
3
4
5
6
7
8
9
	<script type="text/javascript" src="http://cdn.bootcss.com/highlight.js/9.2.0/highlight.min.js"></script>
    <script type="text/javascript">hljs.initHighlightingOnLoad();</script>
    <style type='text/css'>
    .hljs {
      white-space: pre;
      word-wrap: normal;
      overflow-x: auto;
    }
    </style>
Finally
If you directly fork my project and make changes, these custom styles will also be preserved, so you do not need to mess around with replacing Google Fonts or custom code highlighting. However, you must pay attention to the following:
- There is my Baidu Analytics code at the bottom of
_layouts/default.html. Please configure your own code. - There is my Disqus plugin code at the bottom of
_layouts/post.html. Please configure your own code or use Duoshuo comments. - Delete all files under
_posts. - Modify
about.html.